~ Mimi's Adventures in Crafting ~

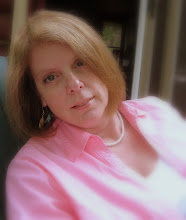
The musings and adventures of a "forty-something" wife and mother whose inner-artisan has been reignited. Enter my realm and enjoy....


Thursday, October 29, 2009

Lined Valance Without A Pattern


Decide on finished size of your valance based upon your window measurements.

My Valance: 49 ¾ inches wide by 14 ¾ inches long

For the valance width I added the following:
  • 1/2 inch side right seam allowanc
  • 1/2 inch left side seam allowance
Cutting Width: 50 ¾ inches

For the valance length I added the following:
  • 1/2 inch top seam allowance
  • 2 ¼ inch header
  • 1/2 inch bottom seam allowance
  • 5 ¼ inch hem

Cutting Length: 23 ¼ inches


Valance Final Cutting Dimension: 50 ¾ inches wide by 23 ¼ inches long

These figures were based upon how long I wanted my valance and that was determined by the pattern repeat in the wildlife print fabric I used. I wanted to make the most out of an expensive fabric and didn’t want to waste or ruin any cuts I’d be making to the remaining unused fabric that I will be making cushions and pillows out of at a later date.


Valance Lining: Cut fabric 50 ¾ inches wide by 8 ¾ inches long


Construction:
  • Due to the loose weave of the wildlife print I serged all the edges without taking any material off
  • Do the same on the lining edges
  • Right sides facing sew the lining and print together along one of the 50 ¾ inch edges.
  • Press the seam open and stitch down the pressed seam on the lining side only, ¼ inch away from pressed center seam (did this so rod doesn't get caught in seam).
  • On the other 50 ¾ inch edge turn under ½” and stitch down.
  • Your valance and lining are now all one piece
  • Hem edge: with right sides together fold up the hem 5 ¼”, baste edges. Do not turn right side out.
  • Header edge: With right sides together fold your valance so that the top (wildlife print) has 2 ¼ inches folded down and the lining is laying flat on top of the hem edge you just turned up. The lining should overlap over the turned up hem edge. Pin down
  • You will be stitching both side seam edges closed breaking at the 2 ¼ inch header mark and restarting the stitching 1 ½ inches down from the header. This will leave an opening to create your casing for your curtain rod.
  • Turn valance right side out tucking your lining under your hem. Press valance making sure you keep the 2 ¼ inch header and the 5 ¼ inch hem.
  • Hand stitch hem closed to lining.
  • Stitch in the ditch at 2 ¼” for top of your rod casing
  • Stich 1 ½” away for the bottom of your casing.
  • Valance is now complete and ready to hang
Header


 Hem

Back of Valance


Finished window with the valance and the roman shade.


B6677


PR: B6677

Pattern Description: Easy To Do Shades

Fabric Used: Broadcloth, Drapery Lining Fabric

Pattern Size: N/A

Did it look like the photo/drawing on the pattern envelope once you were done sewing with it? Yes

Were the instructions easy to follow? Yes

What did you particularly like or dislike about the pattern? Pretty much straight sewing on the view I made (View B). Very easy!

Pattern alterations or any design changes you made: I made valances to go with the shades. The ribbon trim that View B called for would have detracted from the look I wanted so I didn’t sew that on. Next time around I would use a heavier drapery cord than what I purchased.


Would you sew it again? Would you recommend it to others? Yes

Conclusion: I really like the pattern, too bad it is now out of print.

Wednesday, October 28, 2009

M5682


PR: M5682

Pattern Description: Misses’ and Women’s Character Costumes

Fabric Used: Cotton Gingham, Symphony Broadcloth, Light-Weight Cotton Lining

Pattern Size: Cut a size 14

Did it look like the photo/drawing on the pattern envelope once you were done sewing with it? Yes

Were the instructions easy to follow? Yes

What did you particularly like or dislike about the pattern? The pattern was easy to sew. I did not like how the empire waistline was finished in regards to the elastic casing and using the seams themselves as the casing. Considering the dress would be getting taken on and off and that gingham fabric frays easily I took and covered the raw seam edges with ¼” bias seam binding. It gave the inside of the garment a more professional finish.

Pattern alterations or any design changes you made: The pattern did not offer a short sleeve version so I shortened the sleeve 1 ½” beyond the upper most elastic casing. I gave the sleeve a 1” hem and trimmed sleeve with 1 ½” pre-gathered single-edged lace and rick rack. Also, due to the lightness of the gingham fabric I added a full skirt lining underneath out of light-weight cotton.

Would you sew it again? Would you recommend it to others? Yes

Conclusion: If the opportunity arose again and my daughter needed another Halloween costume I’d make this or one of the variations.


In addition to the outfit we conjured up some ruby red slippers.  We purchased an inexpensive pair of flats, spray painted them red and then brushed thinned-down Ailene's Tacky Glue on them and sprinkled with red glitter.  We made bows out of 1" ribbon and applied glue and glitter.  Let both dry and then hot glued the bows onto the shoes.

At a later date I hope to have pics of "Dorothy" and her "Scarecrow" to show how the outfit looked.
 
Enjoy!

Wednesday, October 21, 2009

Ma Ma Ma…Marvelous Myrna

Pray tell…who is Myrna you ask???

Myrna just arrived today after a quick trip up 87 from the borough of Queens in NYC. Even though her trip here was rather short it is anticipated that she will be with us for an extended stay. I have waited almost a lifetime for her to get here and can’t wait to start working with her on the various projects we have planned together, first up being a jacket by Simplicity Patterns that I just fell in love with.

If you haven’t quite figured this one out yet, Myrna is the name I have given my dress form that I have recently purchased. She is stunning from the tip of her neck post, to the padded linen body, right on down to the cast iron of her feet.

The search for Myrna has been an elusive one. After having taken a brief hiatus from sewing I have been recently inspired by the Lifetime series Project Runway. As happen stance would have it, a fellow e-blogger has been a source of inspiration as well with her web presence and online tutorials on You Tube.

With the fire of my inner-seamstress being relit the quest to find a reasonably priced dress form commenced. My search began online with checking out reviews on the more easily accessible dress forms offered by Dritz and Singer. The search engines took me to numerous websites that offered these forms for sale. In reading these reviews I wasn’t too sure I wanted to invest the $$ they were charging for this type of dress form. I am more of a hands-on type person and like to see and touch what I am purchasing.

Recently, during one of Joann's (Joann.com) $ 0.99 pattern sales I got the opportunity to observe the Dritz forms up close. For me, I was not impressed. They do offer the wonderful feature of being able to adjust the form to your measurements but I did not like the space that is left open when you make those adjustments. Yes, you could cover your form in a sheath to compensate for this but then you still are compromising the fit and hang of your garment due to the gaps especially if you are on the large end of your forms dress size. I wasn’t too enthused about the product quality either, they seemed kind of flimsy. If I was going to invest that kind of money on something like this I really wanted to get the quality for the dollars spent.

My search continues…

I stumbled upon several very nice websites for dress forms that are used by designers and fashion school students. One of these sites Fabulous Fit offers a wide variety of forms and the quality of the product offered is definitely worth the money spent. Another site to consider as well would be PGM.  Having said this I still continued on with my search because these forms were a little more than my budget would allow for.

Up next….E-bay

I then proceeded to check E-bay for any offerings and low and behold a hit came back from my search. A company (LaModel), located in Queens, NY was offering a sale on their professional dress forms. They were also offering the product as a “buy-it-now” auction/sale. I was definitely impressed with the price being as the form was on sale and was more than half the cost of the Fabulous Fit form. It was also comparable in price to the flimsy, My Double Deluxe Dritz form and the quality was so much better. The only down side of these forms is that they do not match your measurements exactly but you can compensate for that by purchasing a form that closely matches your measurements and padding your form where necessary.


This company’s form fit into my budget and I placed an order for my size dress form. I was definitely impressed with the company’s response time. I ordered my form on E-bay October 18th and it was sitting on my front porch when I got home from work on October 20th. Wow….

I was so excited to see it sitting there that everything came to a stand still upon entering the house. I immediately opened the shipping carton and was impressed with the packing of the product. They do ship it unassembled and being my husband was out of town some ingenuity in putting it together by me was in order. It didn’t take long, overall maybe 20 minutes and Myrna was standing there before me in all her linen glory.

I am so pleased that Myrna has decided to come and stay with me; she is now a key source of my inspiration and I can not wait to start utilizing her.


As I mentioned earlier a fellow e-blogger (Mimi Goodwin) offers several tutorials online. Up first for me…draping…looking forward to it!!!

P.S. Please Note: Myrna’s size identity has been concealed in order to protect the body measurements of the innocent…or as the case may be, her sewing partner...me. ;-)

Happy sewing…

Monday, October 19, 2009

Felted Purse ~ The Pink Lady

Last fall while visiting my daughter at college we ventured off campus and into Lake Placid for some shopping. The previous week she had gone into a yarn shop with a girlfriend and had seen a felted purse she just had to have. In her minds eye, she thought by bringing me to that very store, she could bat her baby blues at me and give me that “oh-so-forlorn” look and I would then purchase said purse.

Mother’s Please Take Note: Even though they do grow up into young adults they still remain children at heart and look to receive “goodies” from their parents whenever an opportunity might present itself.

In we went and proceeded over to the rack where the purse was hanging amongst the various wool yarns. It was a sweet purse. My daughter just had to inquire with the sales lady as to whether it was being offered for sale. Unfortunately for my daughter, said purse was not for sale. The salesperson directed us to a rack of knitted items for sale that included other felted purses. These purses were beautiful but the price on them was more than I was willing to pay…no matter how beautiful my daughter’s blue eyes are when she is batting them at me in anticipation I was not going to pay that price for something I know I could make for considerably less money and have an end result that would be even better than the store model.

I had always wanted to try felting so we perused the yarn selections and decided we would make one similar to the store model. The sales assistant pulled the pattern for us and guided us to the correct wool yarn. The purse requires a button closure so we made a selection from the beautiful hand blown glass buttons on display.

This is one of the reasons I do love to shop in a “Specialty” yarn shop. You may pay a little bit more for your yarn purchases but the unique items they have are not offered in your big box chain stores.

The pattern is called “The Pink Lady” and is a “Designs by Shelley” pattern. The designer states right from the get go:

“You are going to LOVE this bag! It is so easy, it can be done in one day…done all in one piece, it is a cinch to knit and will make a great gift for that special friend or family member. Make one in all your favorite colors…takes so little time, you’ll be making one for every outfit! Knit Away!”       –Shelley Boardman

I loved this pattern and it was indeed easy and could be completely knit in one day. Following are the materials that I used to make this project:

• Approx. 200 yds. BULKY weight, 100% wool yarn
• Size 13 or 15 – 24” Circular needles
• Button

Note: To create my bulky yarn I used a strand of each of the following knit as one:
2 (50g/109 yd) skeins POEMS 100% wool by Wisdom Yarns, Color 172
1 (4 oz/190 yd) skein of Lambs Pride, worsted weight wool
85% wool/15% mohair, Color M191 Kiwi


The project was completed in no time!!!
Purse prior to being felted.
(Click picture to enlarge)

The part that I was dreading and most anxious about came up next…

I had never felted anything before purposely! Oh Yes…I am one of the “chosen” who have accidentally shrunk wool sweaters to the point of them being made unwearable by its owner. To do this on purpose is a difficult concept to overcome for the fear of ruining the project. I had my reservations as to what the results would be. I dove in and followed the designer’s directions and low and behold a beautifully felted purse appeared as I lifted the washing machine door. It had shrunk down to size rather nicely and had a nice heft to it.


Purse after being machine felted.
(Click picture to enlarge)
In completing this project I made a few modifications. I am one who does not like unfinished looks. For me a purse without a lining is like a flower without its pedals. It has to be as beautiful on the inside as the out.

It doesn’t take much to line the purse and each one will shrink differently so there is no set pattern. I just traced out a lining a little larger than the purse itself plus seam allowances. I added a few pockets and compartments for those necessary things we all like to carry and stitched them on prior to sewing the main lining seam together.

Prior to installing the main purse lining, I also cut a rectangular piece of fabric a little longer than the strap and added seam allowances. I turned under the long edges and hand stitched this in place first. I lined the closure tab as well. Because I was using a glass button I decided there would be less stress on the shank of the button and less chance of it breaking if I just made it more of a decorative closure. Due to this I sewed Velcro to the purse and to the tab lining before sewing in the linings. Install the tab lining and then turn under the edges of the purse lining and hand stitch in place. Sew your glass button on and VOILA one fashionable felted purse.


Purses prior to being felted.
(Click pictures to enlarge)

My daughter loved her purse so much that she wanted me to make two more for her girlfriends as Christmas gifts. Here are the before and after pics of them as well:


Green Purse
• 1 (4 oz./190 yd) skein Lambs Pride, worsted weight, Color M210 Forest Shadows
• 1 (4 oz./190 yd) skein Lambs Pride, worsted weight, Color M120 Limeade

Pink Purse
• 1 (4 oz./190 yd) skein Lambs Pride, worsted weight, Color M200 Strawberry Smoothie
• 1 (4 oz./190 yd) skein Lambs Pride, worsted weight, Color M120 Limeade


The yarn combinations are endless that is what is so great about knitting this purse. At some point I plan on knitting one for myself too. This turned out to be a win-win situation for my daughter and myself; ultimately I did give into the purchase of the purse, in a manner of speaking …in her eyes she scored a purse while I got the opportunity to learn a new concept in the process. No losers there…

Plans for this and many other felted purse projects are found on the designer’s website, “Designs by Shelley”, and can be purchased for a modest fee of $5.

Give this project a shot...you will not be disappointed!


Happy Felting....

Sunday, October 18, 2009

Lighting My Sewing Space


Ok…one can’t say enough for having adequate light to sew by. We live in a rather small house and my sewing space has previously been the dining room table. With my daughter being in her senior year at college and living in her own apartment I have commandeered her room and turned it into my temporary sewing space. On this particular day I decided to finally get the room together and get it lit properly.

What I had been using previously was two, rather small desk lamps and the light of the machines themselves along with the two windows. Needless to say this was not working. Trying to sew in a cave-like atmosphere is not conducive to being very productive. Basically when the sun went down the sewing ceased to continue.

On Friday I decided that I’d head to our local Target store after work and pick up the necessary lighting that would make my life easier. I figured I’d be able to buy what I needed and be back home prior to dinner time and have the room set up while dinner was in the oven. Mmmmm…best laid plans never work out as one anticipates!!!

While putting my light together I noticed the switch wasn’t working correctly. I continued on anyway and got the floor lamp put together and ready for the installation of the bulbs. Well…I was right about the switch…it was bent in an odd direction and when turned would only light one portion of the three-way bulb. I proceeded to test out the new bulbs I had purchased as well…and guess what…they were glowing only one-way. Unbelievable…

Knowing I really wanted to get back up and sewing on Saturday I decided to head back out and make the 40 mile round trip to Target once again. Only issue this time…rush hour traffic on a Friday evening heading to the mall…UGH. Upon arriving at the store I was greeted at the service desk cordially with the return only taking five minutes. With money in hand I headed back to the lighting department to get another light, except this time I decided on a different floor lamp.

Lesson Learned: You get what you pay for…I “cheapened” out on the first light and paid for it in lost time. Never again…

Back home and the new light went together without any issues. Thank goodness…I did not want to repeat that process again! I made dinner and proceeded to spend the next five hours picking stuff up and getting things situated to my liking. By 12:30 AM I’d had enough and retired for the evening knowing I’d be able to start sewing the next day.

• Two Trips to the Mall = $20
• Going 40 miles out of your way = $10 plus another 1.5 hours of your time
• Spending extra $$$ on a second lamp = $30
• Having a room that is well lit….PRICELESS :-D

Onward…

And so it begins...

Recently I have been inspired by what I have viewed in other individuals blogs so thought that I would give this a shot and create a blog about my adventures in crafting and share the knowledge that I have gained over the years.

I suppose a little background information on who I am and where my “craftiness” had its beginnings would be in order. I am a “forty-something” wife, mother and “Jane of all Trades...” I do work outside the home part-time doing computer work for a local highway department but my passion is for crafting, hiking and white water kayaking.

As with many working Moms I’ve had to juggle the various hats one has to wear. My husband and I have made it through the extremely busy high school years and the activities that accompany it with our daughter. In recent years that busy lifestyle has gradually decreased as our daughter has gotten older and has become more independent while attending college. We are now in the twilight of the college experience with her being in her senior year. There is “light” at the end of the proverbial “college” tunnel.

As to the origins of my crafting abilities I can say with 100% assuredness that my Mom has taught me most of what I know. My father contributed as well being an excellent carpenter and craftsman who was meticulous in everything he did right down to the smallest detail. My mom is an accomplished artist in her own right. She draws, paints, sews, knits and is a wonderful cook. What I didn’t learn from my parents has been self-taught. My all time favorite hobbies are sewing and knitting. But I also love to paint (oil, acrylic, and watercolor), crochet, help my husband with his woodworking projects as well as porcelain doll crafting from pouring the mold right down to dressing the doll, and in general…love starting any new crafting project. At the present…wood burning on gourds holds a special interest that I haven’t followed through with yet. But hopefully sometime soon….

So…now that you have some background information let us enter….

“My Adventures in Crafting…”

Welcome & Enjoy!!!

~michele aka Mimi O
Related Posts with Thumbnails